Color grading is the magic that transforms ordinary footage or photos into visually stunning cinematic masterpieces. It sets the mood, evokes emotion, and tells a story beyond the frame. Photoshop, a powerful and versatile tool, allows photographers and filmmakers to achieve cinematic looks without expensive software or complicated workflows.
At Web Sync Zone, we know how critical color grading is to making your visuals stand out. This guide will take you step-by-step through the process of achieving that coveted cinematic look using Photoshop.
Before diving into color grading, start with a clean, well-exposed image.
Adjust the exposure, contrast, and highlights using Curves or Levels adjustment layers.
Remove any distracting elements or blemishes using the Spot Healing Brush or Clone Stamp Tool.
Convert your image to 16-bit mode for smoother color transitions (Image > Mode > 16 Bits/Channel).
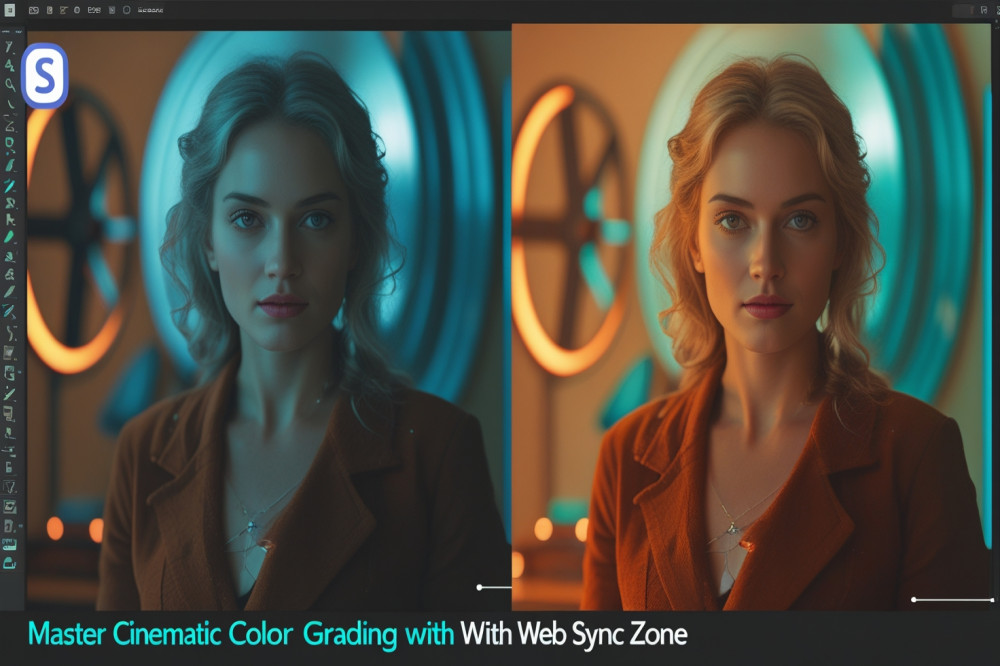
Photoshop’s Color Lookup adjustment layer offers preset cinematic LUTs that can instantly change the mood.
Add a Color Lookup adjustment layer.
Experiment with presets like Teal and Orange, Crisp Warm, or Fujifilm F125 Kodak 2395.
Adjust the opacity of the layer to fine-tune the intensity.
For more control, use selective color adjustments:
Use Selective Color layers to tweak shadows, midtones, and highlights separately.
Add Gradient Maps to create smooth color transitions across tones.
Use Hue/Saturation layers to desaturate unwanted colors or enhance specific hues.
Create Curves adjustment layers targeting shadows and highlights to add contrast and depth.
Apply Vignette effects by creating an oval mask and feathering it to darken edges, focusing attention on the subject.
Use Camera Raw Filter for additional fine-tuning of clarity, texture, and dehaze.
Apply subtle sharpening with the Unsharp Mask filter to enhance details.
Always compare with the original image to ensure the grade enhances without overpowering.
Consistency is Key: Use adjustment layers for non-destructive editing and easy tweaks.
Save Your Own LUTs: After perfecting your grade, export it as a LUT to reuse on other projects.
Work with High-Quality Files: Avoid compression artifacts for clean grading results.
Whether you’re a content creator, filmmaker, or photographer, Web Sync Zone offers tailored digital solutions that elevate your storytelling. Our team combines creative expertise with technical know-how to help you produce visuals that captivate and inspire.
Color grading in Photoshop is an art and a science — mastering it opens endless creative doors. With this step-by-step guide, you’re ready to take your visuals from ordinary to cinematic.
Ready to create stunning visuals that impress?
Contact Web Sync Zone — where creativity meets precision.